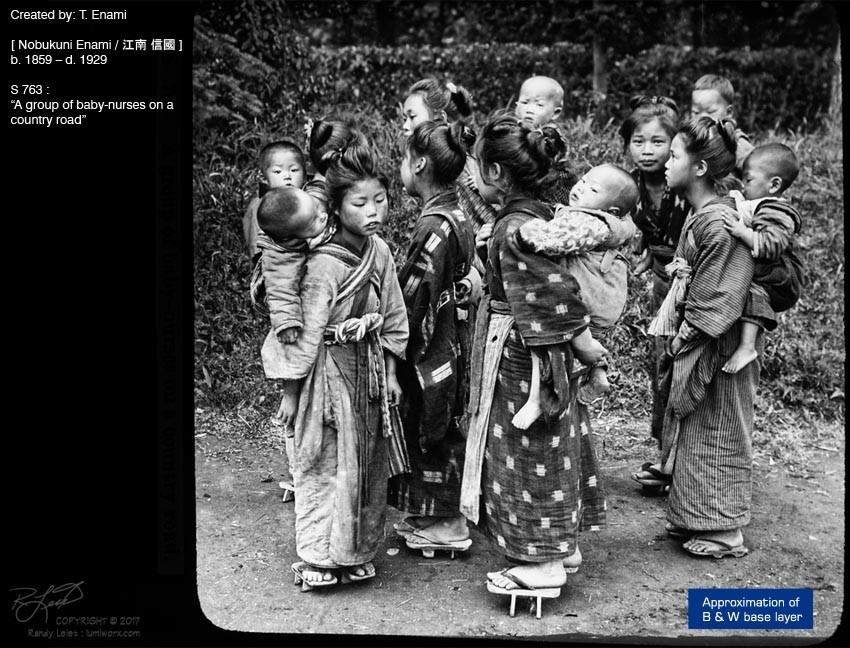
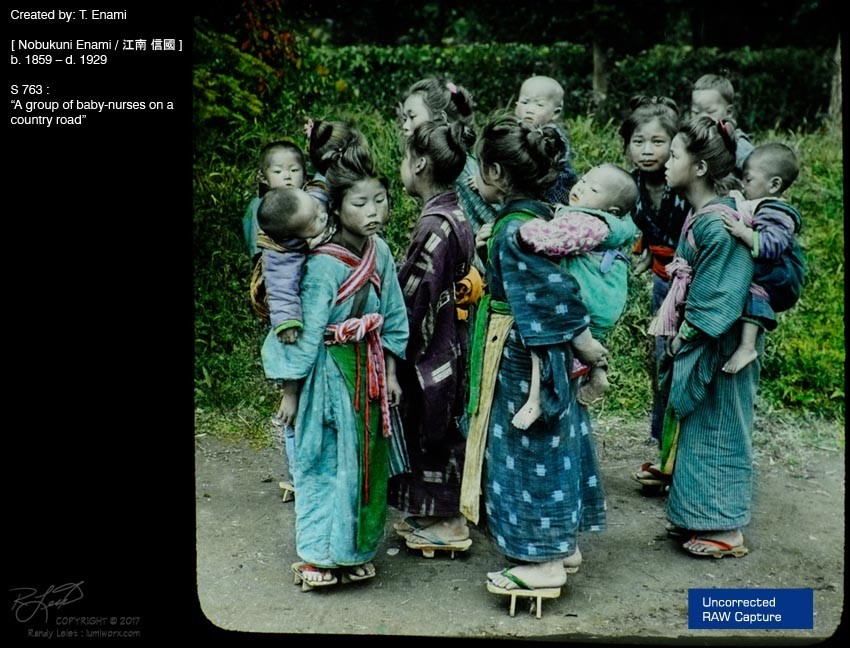
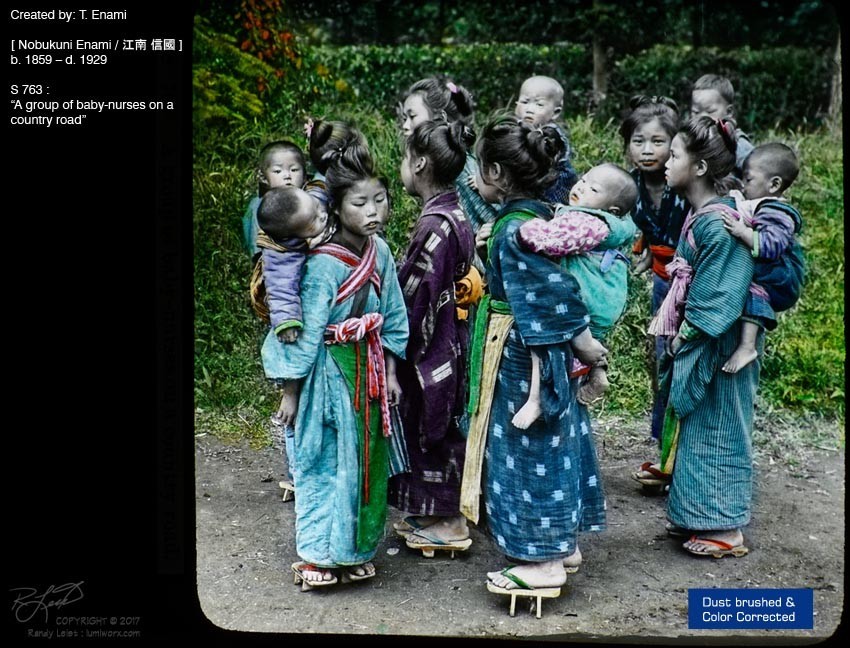
First Enami capture test on 'S 763'
I've gone through the first digital capture test after making some needed improvements on the hardware side of the equation. I've purchased and modified an AirEquipt contact printer from the 1960's to act as the back-lit light table. The steel box that encloses the bulb is light-tight and accepts a top-mounted translucent pane of 1/16 inch Milk Glass to diffuse the constant-color CFL Daylight bulb I've swapped out for the heat producing incandescent it would normally use.
The contact printer is about 8 inches deep, and was built to accept film negatives of up to a standard 5"x7" size. That makes for a sufficient amount of surface area for the light to emanate from. The depth of the box is more than adequate to destroy any possible 'shapes' or patterns that might be generated from the 3-twist fluorescent tube. It places the bulb itself beyond the grasp of any focused lens's depth of field to eliminate anything nearing the Moiré pattern produced from the face of the far-too-close LED array of the Samsung tablet I'd used earlier.
I've created a new carrier for the slides too. Gone is the temporary brown cardboard, and it's been replaced by a proper mat board pair with rectangular cutouts - one piece to provide an 'L-shaped' 1/4 inch 'shelf for the slide to sit on and not fall through, and one topping that to allow for the slide to be snuggly held in place for continuous placement at a precise point and position. The mats are edged in black pigment ink and covered with clear poly tape to ensure easy removal between captures. The entire carrier is also covered in 3mm black neoprene rubber to help in safely securing the carrier, acting as a flat blackout material, and providing a soft and bounce-free surface as slides are placed into it. The tape and mat material used are acid free, and I'm handling the slides - as always - with latex or nitrile or cotton gloves. The Neoprene isn't acid free, but it's not used for storage or presentation purposes, so as long as it is only used on a temporary holder and never in direct contact, I think it should be fine. Underneath this sandwich is an appropriately cutout PE closed cell foam block, with a reflective white mat board wall to reflect and further scatter the light.
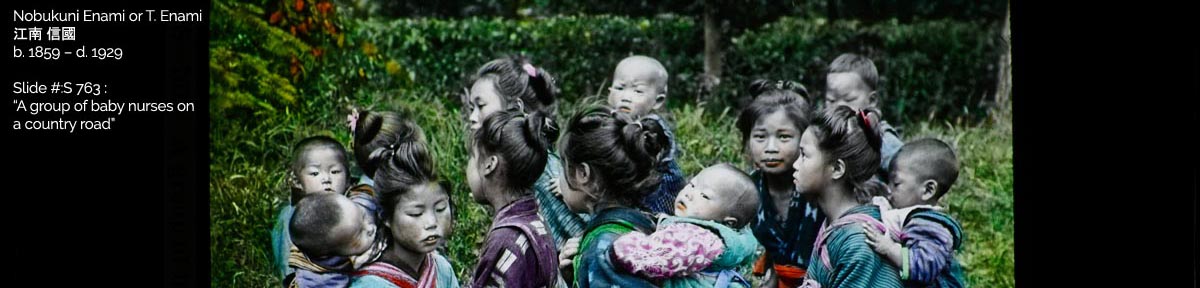
Baby-nurses test captures
As for the capture device and lens, I've switched to my Nikon D5200 digital body with a Lester Dine (Kiron) 105mm f/2.8 1:1 Macro lens. The camera is mounted on the horizontaly oriented arm of a Manfrotto 3021-BPRO tripod to allow for a level and vertically centered camera position above the AirEquipt. This type of setup allows for an easy repositioning if needed, and a very stable mount for capturing. I also have the option of a direct tether to my PC via a USB connection - or - a wireless connection as a networked device when using Nikon's WU-1a Wireless mobile adapter. I also have the additional capability of using one of two SD memory cards I have that are self contained wireless hubs.
This brings me to the software I've used as a starting point for what workflow to use.
If I begin at the input part of the software chain, I have several choices for the tethering duties - with some of the candidates being dependant on the camera being used. With the Nikon, I can use qDslrDashboard, either loaded onto a PC or as an Android app on a phone or tablet. I've used it many times before, and it's been flawless once a connection is established. My other options are Lightroom v5, Nikon's own Android app to connect to the WU-1a, digiCamControl (which I've installed, but not tried yet), or just using the auto-download capabilities of either of my SD cards.
For this brief first test, my major concern was acquiring a usable capture that was as clear and as visually detailed as needed, so I didn't complicate the process by auditioning tether options. I most certainly will before it gets to the point of efficiently processing the slides en masse. I doubt I'll use the flash cards, as I'd prefer to have a large enough preview during the actual shooting process to easily confirm edge-to-edge focus and squared-up alignments from image to image. My preference is always to capture at the NRW (raw) stage, without mucking about with any chance of the software I use being a noise generator or other unnecessary influence on the capture quality. Time will tell which option will win out.
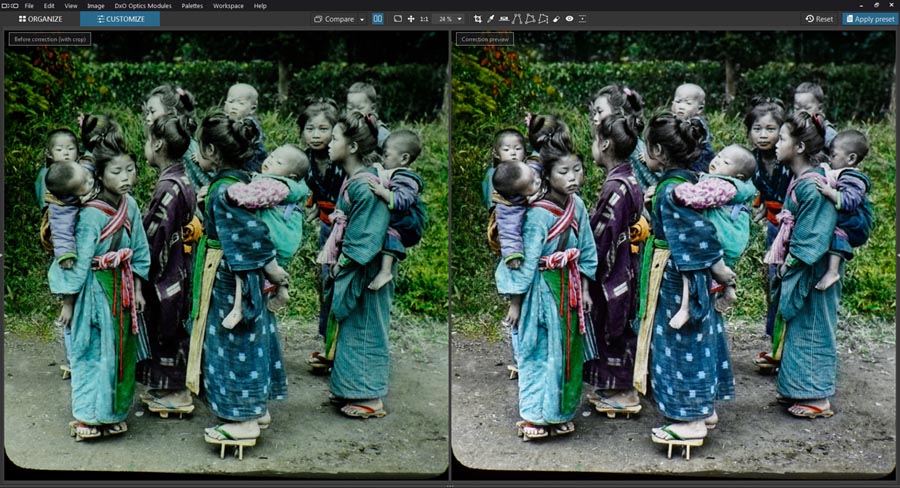
Once the raw files are captured and copied to network storage devices, I'll most likely end up with the same workflow I've used for some time now. It's a mix of DxO Optics Pro v.11 (now called DxO PhotoLab) for the initial color corrections and dusting at the raw level and then exporting to 16bit Tiff files. Then PhotoShop CS2 for EXIF and IPTC and any evil little gotchas that I can't stamp out smoothly with DxO. Last of all, it's off to Lightroom for cataloging and file management. I have several other programs that are capable of stepping in as either raw file or converted image manipulators - but - I'm not expecting they'll see any use with the Enami captures. I've already decided that I'm not going to do any type of retouching.
I'll remove sensor dust, or surface gunk if it's stuck too stubornly to the glass that I dare not be too aggressive in cleaning... but 99.8% of the errant brush hairs that are still embedded in the gelatin, or the occasional dot of out-of-place tinting will visibly remain exactly as they are. These are 'under the glass' and I feel that they're an integral part of the finished image that would have been largely and grandly splashed across someone's wall - just in the way they were always intended to be viewed. I removed a single green accidental dot in the Baby-nurses photo because it was overly distracting and made it difficult to take in the image without obsessing on it's presence. Otherwise... If the finished results were good enough for Enami and his trusted artisans, who am I to argue that they don't belong there for everyone to see.
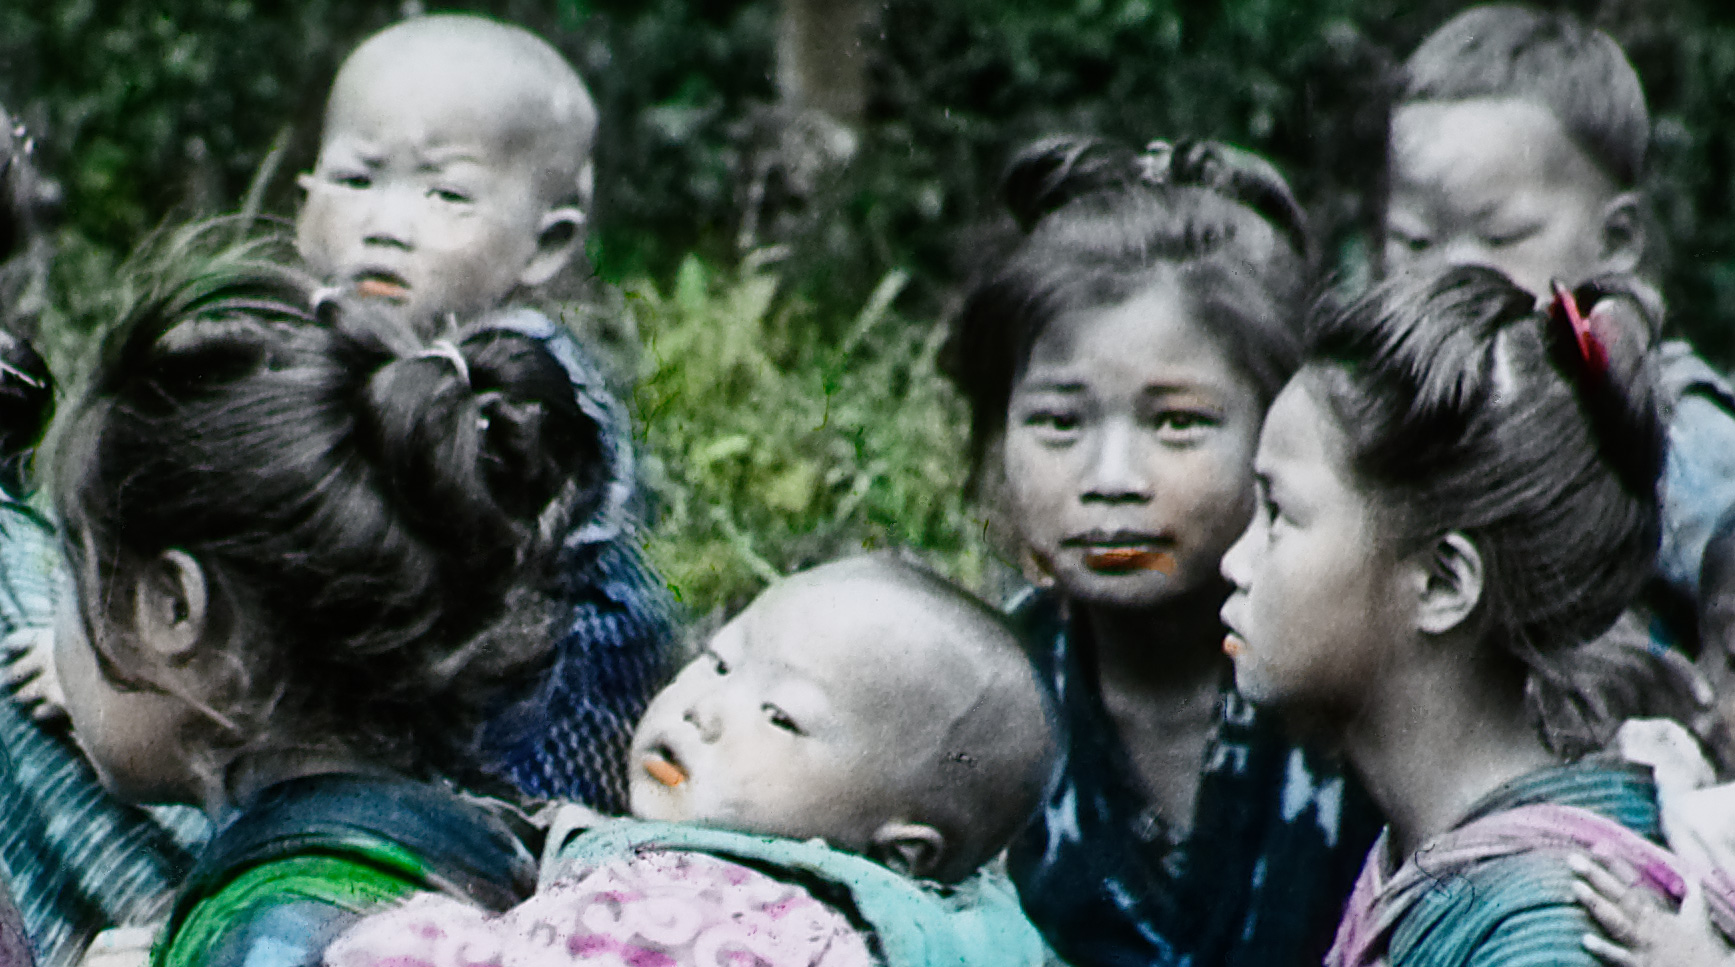
The image above is a 100% crop of the 'S 763' photo that gives one a sense of what details are visible when the image is enlarged to it's 'full size' if you're viewing this page on your desktop's HD display at a 1920x1280 pixel resolution. The original capture on the 24MP sensor tops out at 6000x4000 pixels. The quality setting for this image when saved has been compressed at 80% in order to keep the overall file size at a reasonable level, so it will appear a bit soft.
